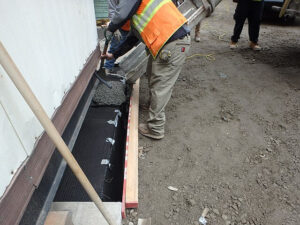
Over time, the concrete surface on your driveways tends to appear old and worn out due to oxidation, weather, heavy loads and constant foot and vehicle traffic. And as a result, some parts of the concrete tend to crack, crumble, or develop cavities which can ruin the overall appearance and functionality of your driveway.
If this happens, it’s recommended to undergo concrete resurfacing to make a dated, damaged, and discolored concrete look like new again. And if you’re looking for more details on this process, you’ve come to the right place.
Stick around as we’ll tackle the steps on how to resurface concrete and patch cracked and potholed surfaces in today’s article.
STEP 1: Prepare All The Needed Tools And Materials

Before you start this project, you have to prepare all the things you need first. So here are the common tools and materials needed for concrete resurfacing:
- Power Drill
- Pressure Washer
- Measuring Pail
- 5-Gallon Bucket
- Long-Handled Squeegee
- Hose
- Chisel
- Hammer
- Wire Brush
- Finishing Broom
- 1/4 Inch Weatherstripping
- Gloves
- Safety Glasses
- Concrete Resurfacer
- Patching Compound
STEP 2: Cleaning And Patching
Prepare the old surface by using the pressure washer and set it to 3500 psi to remove dirt, oil, grease, flaking concrete. This is necessary so the new layer of concrete will properly adhere to the old surface. If you don’t a pressure washer, you can head to your local home center to rent one.
After pressure washing the concrete, locate all the cracks, cavities, and crevices and patch them with a patching compound. Allow it to dry before hosing the surface. Remove any standing water using the broom.
STEP 3: Mixing The Concrete Resurfacer
Pour 3 and 1/2 quarts of water into the 5-gallon bucket then slowly add the concrete resurfacer while mixing it using the power drill. Continue mixing for 5 minutes until the mixture is free of lumps and has reached a syrup-like consistency. You can add more water if the mixture is still too thick.
Then, fit the 1/4 weatherstripping into the joints to prevent the mixture from filling them.
STEP 4: Pouring And Spreading The Mixture Over Small Sections
Apply the resurfacer mixture at a modest area and spread it evenly using the long-handled squeegee and allow it to set for 5 minutes. Make sure to work quickly as the mixture hardens faster in the bucket when the weather is hot. So it’s recommended to place it under a shaded area or use cold water during the mixing process.
STEP 5: Finishing
For a non-slip finish, use a concrete broom and run it across the surface in one direction. Then allow the resurfaced concrete to cure for at least 6 hours and 24 hours before walking and driving on it, respectively.
During mild weather, the resurfacer mixture will just cure on its own. However, if the weather is above 90 degrees, it is recommended to mist the surface intermittently for the next 48 hours to make sure it is durable before use.
And there you have it, the steps you need to follow to resurface your old and pitted concrete.

