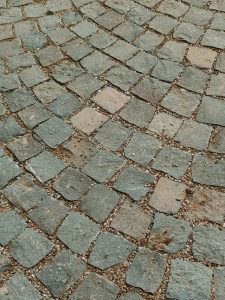
Brick pavers are a popular choice for outdoor pathways, patios, and driveways due to their durability, aesthetic appeal, and easy maintenance. However, over time, these pavers can become uneven and cause tripping hazards. To ensure a safe and visually appealing surface, it is essential to level brick pavers.
So how to level brick pavers? In this comprehensive guide, we will walk you through the step-by-step process of leveling brick pavers effectively.
Understanding The Importance Of Leveling Brick Pavers

Leveling brick pavers not only enhances the overall appearance of your outdoor space but also provides a safer environment. Uneven pavers can lead to water pooling, resulting in slippery surfaces and potential accidents. Moreover, properly leveled pavers prevent the growth of weeds and reduce the risk of costly repairs in the future.
Tools And Materials Needed
Before we begin, gather the following tools and materials:
- Safety goggles and gloves
- Leveling sand
- Rubber mallet
- Tamper or plate compactor
- Straight edge or long 2×4 board
- Hand trowel
- Broom
- Water source (hose or buckets)
The DIY Method On How To Level Brick Pavers
Step 1: Prepare The Area
Start by removing any existing pavers or debris from the area. Use a shovel or rake to clear the surface thoroughly. Ensure that the area is free from weeds, grass, and other vegetation.
Step 2: Determine The Desired Slope
To promote proper drainage, determine the desired slope of your brick paver surface. A slight slope of 1/8 inch per foot away from structures is generally recommended. This slope will prevent water from pooling and direct it towards the appropriate drainage system.
Step 3: Add Base Material
The base material provides a stable foundation for the pavers. Spread a layer of leveling sand over the prepared area. Aim for a depth of around 2 to 3 inches. Use a rake to evenly distribute the sand.
Step 4: Compact The Base
Using a tamper or plate compactor, compact the base material to ensure stability and prevent settling. Start at one end and work your way across the entire area. Repeat the process until the base is firm and even.
Step 5: Install Edging
Edging is essential to maintain the integrity of your paver surface. It helps contain the pavers and prevents them from shifting. Install the edging along the perimeter of the project area, securing it firmly in place.
Step 6: Lay The Pavers
Begin laying the pavers on top of the leveled sand base. Start from one corner as you pave and work your way towards the opposite end of the walkway or pavement. Leave a small gap between each paver to allow for jointing sand. Use a rubber mallet to gently tap each paver into place, ensuring they are level with one another.
Step 7: Check For Levelness
Periodically check the levelness of the pavers as you work. Place a straight edge or long 2×4 board across multiple pavers, and use a level to ensure they are even. Adjust the pavers as necessary by adding or removing sand underneath.
Step 8: Fill In The Joints
Once all the pavers are in place and level, it’s time to fill in the joints. Spread a layer of jointing sand over the entire surface. Use a broom to sweep the sand into the gaps between the pavers. Continue sweeping until the joints are completely filled.
Step 9: Compact And Settle The Pavers
To ensure the pavers are firmly in place, use a plate compactor or tamper to compact the surface. This step helps the pavers settle and creates a solid and stable surface.
Step 10: Clean And Seal
After the pavers have settled, clean the surface with a broom and remove any excess sand. Consider applying a sealant to protect the pavers from stains, weathering, and weed growth. Follow the manufacturer’s instructions for the best results.
Hiring Professional Help If DIY Doesn’t Work
If you find the process of leveling brick pavers too complicated, consider hiring a professional contractor. A qualified contractor will have the right tools and expertise to get the job done quickly and efficiently. Be sure to research your options and hire an experienced professional with a good track record.
We recommend you to call Install Brick Pavers in Orlando today as they offer the best services and use advanced technology to level brick pavers. They use advanced equipment to ensure an even surface and guarantee workmanship for up to five years. Contact them today for a free estimate!
Bottom Line
No matter which path you choose, it is essential that you maintain your brick paver surfaces regularly. Periodically check for any loose or damaged pavers and address any issues immediately. When done correctly, brick pavers will provide a safe, aesthetically pleasing outdoor space for years to come.
This article has provided you with all the information on how to level brick pavers effectively. With these tips in hand, you can now confidently begin your next paver installation project. If you have any further questions or need help, don’t hesitate to reach out for professional assistance. Good luck!

